

Making your own pasta at home is the culinary equivalent of switching from standard definition to 4K. It’s a tactile, rewarding process that transforms humble ingredients—flour and eggs—into a gourmet centerpiece.
While you can certainly roll dough by hand with a rolling pin, a pasta making machine is the engine that brings professional consistency to your kitchen. Here is a deep dive into everything you need to know about these machines, from the mechanics to the maintenance.
1. Types of Pasta Machines
Before you start flouring your counters, you need to decide which "lane" of pasta making you want to occupy. Machines generally fall into three categories:
Manual Crank Machines
These are the iconic, stainless steel machines you’ll see in Italian nonnas' kitchens. They clamp to your table and require you to turn a handle with one hand while guiding the dough with the other.
Pros: Highly durable, no motor to break, gives you "feel" for the dough.
Cons: Requires a bit of coordination; needs to be clamped to a sturdy surface.
Electric Roller Machines
These look like manual machines but swap the hand crank for a built-in motor.
Pros: Leaves both hands free to handle the dough; much faster for large batches.
Cons: More expensive; can be noisier.
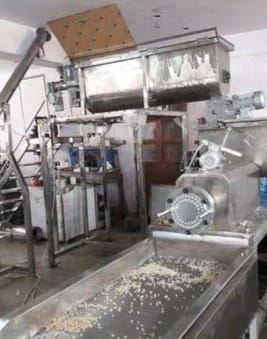
Automatic Extruders
Unlike rollers (which make flat sheets), extruders force dough through a die (a shaped disk) to create shapes like rigatoni, fusilli, or penne.
Pros: The only way to make tubular pasta shapes; often fully automatic (mixes and extrudes in one bowl).
Cons: Harder to clean; the texture is different from traditional rolled pasta.
2. Anatomy of a Manual Roller
Understanding how your machine works helps you troubleshoot issues mid-batch. Most manual rollers consist of:
The Smooth Rollers: Two adjustable cylinders that flatten the dough.
The Adjustment Knob: Usually numbered 0 through 9. This determines the gap between the rollers (the "thickness").
The Cutters: Detachable or built-in blades that slice the flat sheet into ribbons like fettuccine or tagliolini.
The Clamp: A screw-mechanism to keep the machine from sliding across your counter.
3. The Pasta-Making Process: Step-by-Step
The machine is only half the battle; the technique is the other half.
Phase 1: The Dough
Standard "Pasta Fresca" usually follows the 100/1 ratio: 100 grams of "00" flour to 1 large egg.
Mix until a shaggy mass forms.
Knead for 8–10 minutes until the dough is smooth and elastic.
Crucial Step: Rest the dough for at least 30 minutes. This allows the gluten to relax, preventing the dough from "snapping back" when you roll it.
Phase 2: The Laminating (Rolling)
Set your machine to the widest setting (usually 0 or 1).
Flatten a piece of dough into a disk and run it through.
Fold it in thirds (like a letter) and run it through again. Repeat this 3–4 times on the widest setting. This "laminates" the dough, giving the final pasta a silky, "al dente" snap.
Slowly click the dial to the next thinnest setting, running the dough through once or twice at each level. Do not skip numbers.
Phase 3: The Cut
Once you’ve reached your desired thickness (usually level 6 or 7 for fettuccine, 8 or 9 for ravioli), let the sheet air dry for about 5–10 minutes. If it’s too wet, it will stick in the cutters. If it’s too dry, it will crack. Feed it through the cutting attachment, and catch the nests of pasta on the other side!
4. Maintenance and Longevity
The #1 rule of pasta machines: Never use water.
Water causes the internal gears to rust and turns the leftover flour inside the machine into a sticky glue that is impossible to remove.
To Clean: Use a dry pastry brush to flick away excess flour.
For Stubborn Bits: Run a small piece of "scrap" dough through the rollers and cutters; the dough will act like a magnet, picking up dried bits from the nooks and crannies.
Storage: Keep it in a dry place. If the rollers squeak, a tiny drop of food-grade mineral oil on the ends of the rollers usually does the trick.
5. Which One Should You Buy?
| Feature | Marcato Atlas 150 (Manual) | KitchenAid Attachment | Philips Pasta Maker (Extruder) |
| Best For | The Traditionalist | The Multi-tasker | The Busy Weeknighter |
| Durability | Inherit-it-to-your-grandkids | High (Motor dependent) | Moderate (Plastic parts) |
| Ease of Use | Learning curve | Easy | Fully Automatic |
| Price | $$ | $$$ |
6. Pro Tips for Success
Flour is your friend: Dust the machine and the dough frequently with semolina flour. Semolina is coarser and doesn't get absorbed into the dough as easily as all-purpose flour.
The "Windowpane" Test: Before rolling, stretch a small piece of dough. If you can see light through it without it tearing, your gluten is perfectly developed.
Speed Matters: On a manual machine, try to maintain a consistent cranking speed. Jerky movements can create "waves" or uneven thickness in the pasta sheet.
Common Troubleshooting
Pasta is "shredding" at the edges: The dough is too dry. Add a teaspoon of water and re-knead.
Pasta is sticking to the cutters: The dough is too wet. Dust it with more flour and let it air dry for a few more minutes before cutting.
Making pasta is as much about the journey as the destination. There is something incredibly meditative about the rhythmic turn of the crank and the sight of a golden sheet of dough growing longer and thinner with every pass.